Prerequisites
- Docker Desktop for Windows installed and running.
- WSL 2 backend is recommended for best performance (Docker Desktop will prompt you to enable this during installation if it isn’t already).
- Port 3000 available on the host.
- Port 1514 available (optional — only if using the Device Beacon syslog receiver).
Edition Overview
AppTelePorter ships in two editions. This guide uses the Lite edition in all examples. To install the Max edition instead, replace appteleporter_lite with appteleporter_max wherever it appears.
| Edition | Use Case | Docker Hub |
|---|---|---|
| Lite | Bring your own LLM (OpenAI / Claude / Gemini). All credentials stay on your server; only conversation context goes to the cloud LLM for inference. | networkevolution/appteleporter_lite |
| Max | Fully self-contained with a bundled local AI model. Nothing ever leaves your network. GPU-enabled host recommended. | networkevolution/appteleporter_max |
Step 1 — Pull the Docker Image
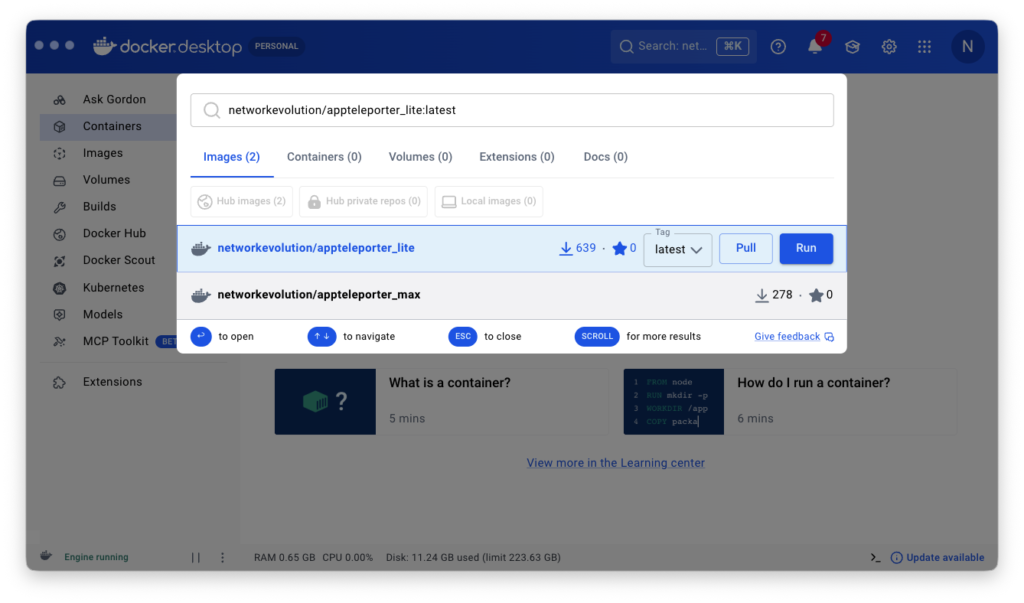
- Open Docker Desktop.
- Click the global search bar at the very top of the window (not the search inside the Images tab — that only filters locally downloaded images).
- Type
networkevolution/appteleporter_lite. - Select the image from the Docker Hub results and click Pull. Wait for the download to complete.
- The image will appear under Images in the left sidebar.
- Select the image from the Docker Hub results and click Pull.
networkevolution/appteleporter_lite:latestWait for the download to complete before proceeding.
Step 2 — Create the Data Directory
Create a folder on your machine where AppTelePorter will store all persistent data — plugins, MCP servers, the encrypted vault, chat history, and configuration.
Using File Explorer (no terminal needed):
- Open File Explorer.
- Navigate to any location where you want to store AppTelePorter persistent data(e.g.,
C:\Users\YourName). - Right-click → New → Folder.
- Name it
appteleporter-data.
This directory is volume-mounted into the container. Your data persists across container restarts and upgrades — just pull the new image and re-run with the same volume path. The folder structure is auto-populated on first run.
Step 3 — Start the Container
Choose one of the methods below. Docker Desktop must be running before proceeding.
Port reference:
| Port | Protocol | Purpose |
|---|---|---|
3000 | TCP | AppTelePorter Web UI (required) |
1514 | TCP + UDP | Syslog receiver for Device Beacon (optional) |
What is Device Beacon? A built-in add-on that listens on port 1514 for syslog messages (RFC 3164/5424), extracts device identity and status, and maintains a live device inventory in the UI. If you don’t need it, skip the 1514 port mapping. It can also be disabled at any time from Settings → Add-On Settings → Device Beacon.
Docker Desktop UI
- Open the Docker Desktop application.
- Click the Search bar at the top and type:
networkevolution/appteleporter_lite - Select the image from the results and click Pull to download it.
- Once the pull completes, find the image under Images in the left sidebar and click Run.
- Expand Optional settings and fill in the following:
- Setting Value Container name
appteleporter - Host port
3000→ Container port3000(required) - Host port
1514→ Container port1514TCP + UDP (optional, only for Device Beacon) - Volume — Host path Select the folder from Step 2, e.g.
C:\Users\YourName\appteleporter-dataVolume — Container path/app/backend/appteleporter-data - ⚠️ Do not change the container path. It must be exactly
/app/backend/appteleporter-data.
- Setting Value Container name
/app/backend/appteleporter-data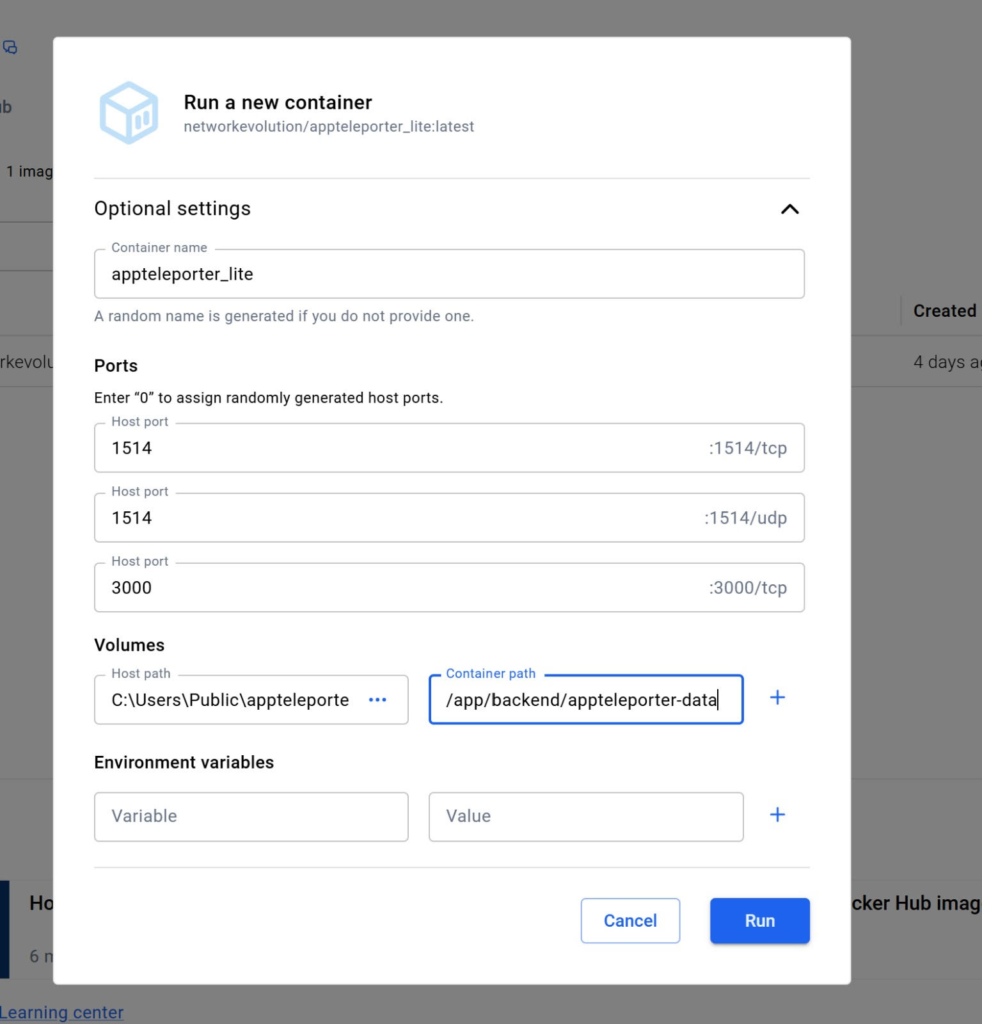
6. Click Run. The container will start and appear under Containers.
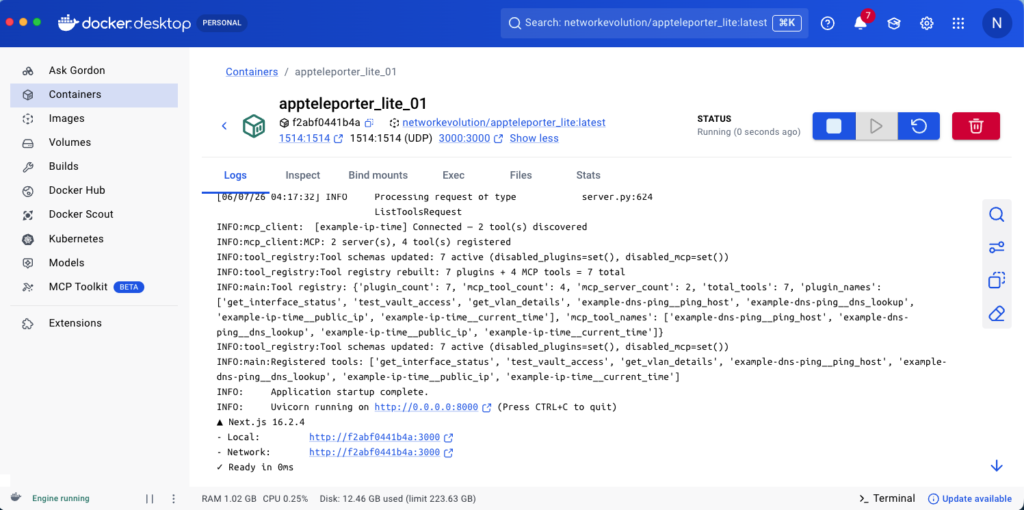
Under Containers in Docker Desktop you should see appteleporter in the list with status Up.
Step 4 — Open the UI and Complete First-Time Setup
Open your browser and go to:
http://localhost:3000Note: The standard container serves on HTTP. Custom SSL/HTTPS builds tailored to specific organisational requirements are available — contact appteleporter.ai for details.
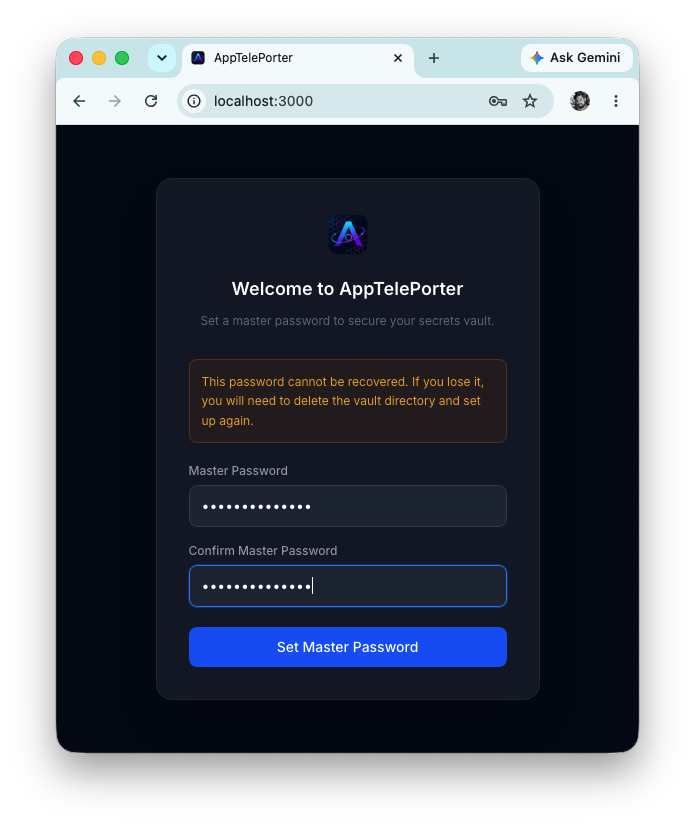
Step 4a — Set the Vault Master Password
The first screen prompts you to create a vault master password. This password encrypts everything AppTelePorter stores:
- All device and API credentials (SSH usernames, passwords, API keys, host addresses)
- User accounts and access tokens
- LLM provider API keys and model settings
- Application session signing secrets
⚠️ This password cannot be recovered — ever. Store it somewhere safe.
AppTelePorter never stores your master password on disk or in a database. Your password is processed through Argon2id (a memory-hard key derivation function) to produce a 256-bit encryption key, which encrypts the entire vault as a single AES-encrypted blob. The key is then discarded. Only a bcrypt hash is kept for unlock-time verification.
There is no password reset, no recovery email, and no backdoor. If you lose it, all stored credentials and accounts must be recreated from scratch.
Enter a strong master password and confirm it to proceed.
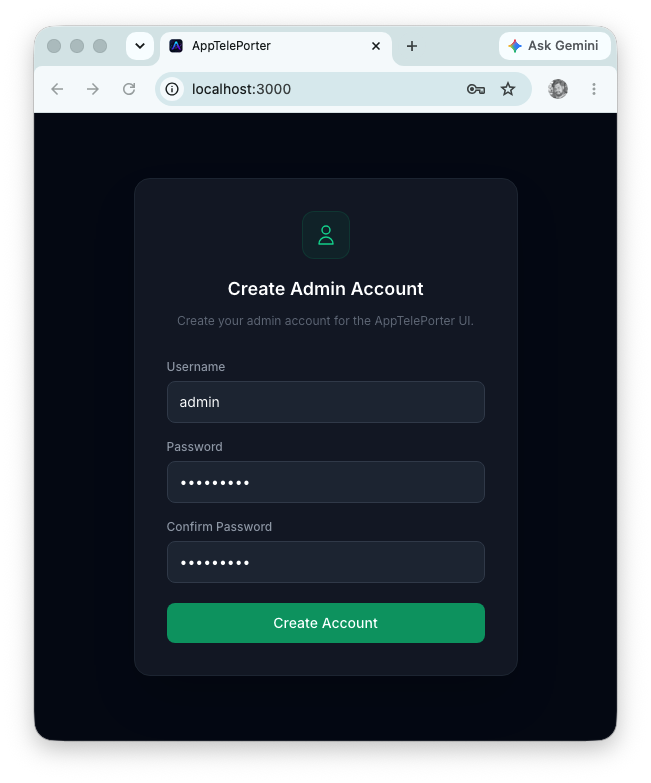
Step 4b — Create the First Admin User
After setting the vault password, you are prompted to create the first admin user — the account you’ll use to log in to the AppTelePorter interface.
Set a username and a strong password. Additional users can be added later from Settings → Users.
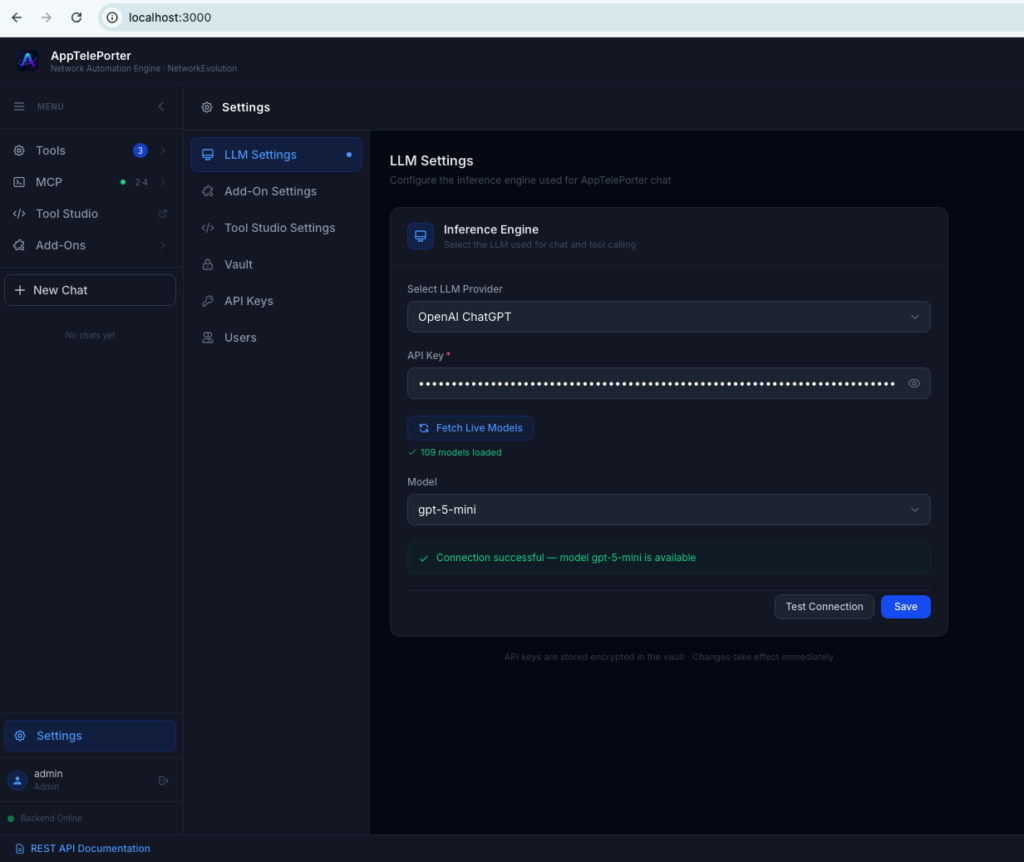
Step 4c — Configure Your LLM Provider (Lite Edition Only)
Max edition users: Skip this step. The Max edition includes a bundled local model and is ready to use immediately after login.
For the Lite edition, the AI cannot process any requests until you connect it to an LLM provider. Navigate to:
Settings → LLM Settings
Select your preferred provider and enter the corresponding API key:
| Provider | What You Need |
|---|---|
| OpenAI (ChatGPT) | OpenAI API key |
| Google Gemini | Google AI Studio API key |
| Anthropic Claude | Anthropic API key |
Click Test Connection to verify the key is working. Once confirmed, AppTelePorter is ready to use.
Need support for a provider not listed? Contact info@networkevolution.in — it will be treated as a feature enhancement request.
You’re Ready
AppTelePorter is now running. You can start building your own tools using Tool Studio or use the existing tools from ecosystem
Your network. Your AI. Your data. Built by Network Evolution
Leave a Reply